
Photoshop & Photography Education
For All Skill levels!
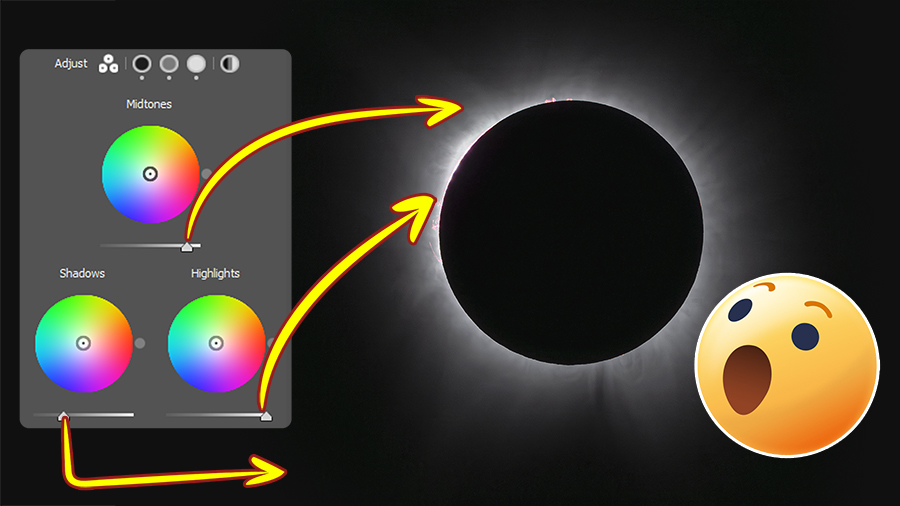
Color Grading for Stunning Eclipse Photos
Having trouble editing your Solar Eclipse shots? Corona detail lost? In this video, I dive deep into the post-processing...
Meet Blake
Blake Rudis is a classically trained artist who started as a painter. He transitioned into printmaking and sculpture while attending the University of Delaware, where he received his Bachelor’s degree in Fine Art.
His passion for all things Fine Art shifted when he decided to double down on his love for the American landscape. Shooting analog film starting in 1998, he took up digital photography in 2006. His journey through the American Landscape led him to start a blog and YouTube channel in 2010. Blake incorporates his knowledge of Fine Art, aesthetics, and color theory in his courses and is known for his acclaimed Photoshop® workflow.
Blake is a self-published author and works as an independent photo educator. Some of his partnerships include Topaz Labs, ON1, and Creative Live. Throughout his teaching efforts on his website f64Academy.com, Blake has helped hundreds of thousands of photographers excel in photo post-production turning ho-hum photos into stellar works of art.

Connect with Blake
Blake@f64academy.com